How to Properly Install Wall Tiles in a Bathroom?
Installing wall tiles in a bathroom can transform the space into a stunning and functional area. Whether you’re a seasoned DIY enthusiast or a beginner, this guide will walk you through the process, ensuring a smooth and successful tile installation.
Gather Your Tools and Materials
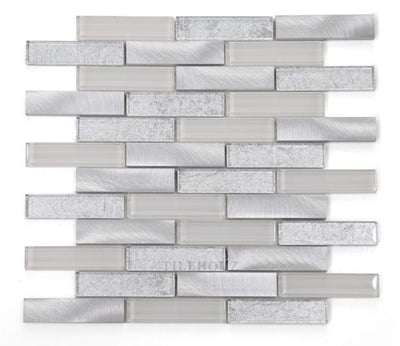
When embarking on a bathroom wall tile project, being prepared is half the battle. Start by assembling your essential tools such as a notched trowel and a reliable tile cutter, to make precision cuts as new fixtures arise. Don’t forget your safety gear like goggles and gloves to protect yourself from dust and sharp edges. It’s equally critical to have the right materials, such as tile adhesive and grout to secure and finish their placement. For an exceptional touch, consider exploring some exquisite designs such as our Diana Brick Calacatta mosaic tiles, which add a luxurious feel to any bathroom.
In addition to these basic supplies, make sure to include spacers to maintain consistent gaps between tiles, ensuring a professional look. These gaps are not just aesthetic; they provide room for the grout to settle and for the tiles to expand slightly in response to temperature changes.
Prepare the Surface
A crucial step before starting your tiling project is to ensure the wall is pristine. Begin by removing any old tile or wallpaper, and sanding the wall to create a smooth surface. This will help the tiles adhere better. If your wall is uneven or has significant damage, consider using a cement backer board, as suggested in the DIY Shower Tile guide. The board is moisture-resistant, offering additional protection from water damage in the bathroom.
It’s important to inspect the condition of underlying structures, such as the shower studs. These should be devoid of mold and sturdy enough to support the tiles. If any rot is present, it’s recommended to seek professional advice before proceeding further.
Plan Your Layout
A well-thought-out layout is key to a seamless tile installation. Start by measuring the wall space to calculate how many tiles you’ll need, allowing for an extra 10% to account for cutting mistakes or future repairs. Planning the layout also involves deciding on the pattern you want to use. Whether opting for a classic grid or a more intricate herringbone, mapping it out with guidelines on the wall will keep your design true and balanced. For inspiration, visualize how the tiles will complement your bathroom’s existing style and features.
It’s beneficial to dry-fit a few tiles at the center of the wall as a starting point. This helps prevent awkward, small cuts at the edges, resulting in a more harmonious appearance. Adjust your layout until satisfied, as this will guide you during the adhesive application stage.
Apply Tile Adhesive
Once your layout is ready, it’s time to apply the tile adhesive. Use a v-notched trowel to spread an even layer along your marked guidelines. Working with small sections is advisable to avoid the adhesive drying too quickly before you’re able to set the tiles. This ensures each tile sits firmly in place without slipping.
The type of adhesive you use can have a significant impact on the final appearance of your tiles, particularly with glass or translucent materials. White polymer-modified thin-set is often recommended for such applications to enhance the inherent beauty of the tile without any underlying color distortion.
Lay the Tiles
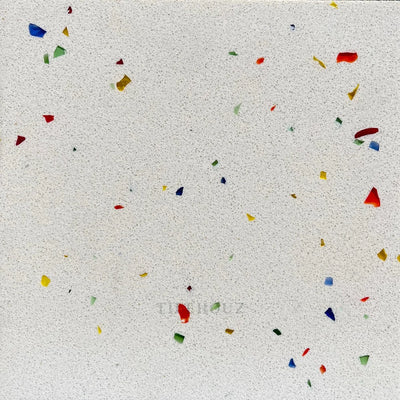
Now comes the exciting part—laying the tiles! Start from the center and work outward, using spacers for even gaps between each tile. Check your lines frequently to ensure they’re straight and aligned with your guidelines. Adjust as necessary. For an additional decorative element, consider a feature wall using the Italian Terrazzo Light Grey tiles, offering a sophisticated and understated aesthetic.
It’s wise to periodically step back and visually inspect your progress. This helps you catch any alignment issues early on. Perfection in alignment can take a little extra time but greatly contributes to a polished, professional finish.
Cut and Fit Tiles
Using a tile cutter, trim tiles meticulously to fill corners, edges, and spaces around quirky fixtures like outlets or light switches. For a more challenging cut, a wet saw may be necessary due to its precision. Pay special attention to tiles in high-visibility areas, ensuring a neat and refined fit. As you progress, integrate tiles like the Italian Terrazzo Arctic White for a striking contrast against darker tiles or surfaces.
For those rounded corners or plumbing fixtures, tile nippers can be invaluable for making detailed, small adjustments without compromising the tile’s integrity. A steady hand and patience here will pay off in achieving a clean, professional look.
Grout the Tiles
Once the adhesive has cured, grouting is next on the agenda. Mix your grout following the manufacturer’s instructions until you achieve a smooth, peanut-butter like consistency. Using a rubber float, apply the grout at an angle to fill the joints, working carefully to avoid air pockets. Unsanded grout should be used on polished tiles to prevent scratching. Once applied, wipe excess grout with a damp sponge to ensure clean tile surfaces, mindful not to disturb the grout lines.
After the initial drying period, any residual grout haze can be polished off the tile surfaces with a dry cloth. For particularly stubborn haze, a specialized grout haze remover may be applied, ensuring the tiles sparkle as intended.
Seal the Grout
Sealing grout is the final step, locking out moisture and prolonging the installation’s life. Apply a quality grout sealant, paying special attention to areas prone to water exposure. For added protection, use silicone sealant at joints and corners, ensuring no gaps remain for water ingress. This protective layer not only maintains the vibrant look of your wall tiles but also helps to stave off mildew and staining.
After applying the sealants, it’s crucial to observe the recommended curing time before using your newly tiled bathroom. This patience ensures all layers are firmly set, giving you pristine results for years to come.
Wrapping Up Your Tile Installation
By following these steps, you’ll have a beautifully tiled bathroom wall that enhances the style and function of your space. Enjoy the satisfaction of completing a DIY project that truly transforms your home.

